10 Easy Halloween Party Foods Kids Can Grab With One Hand
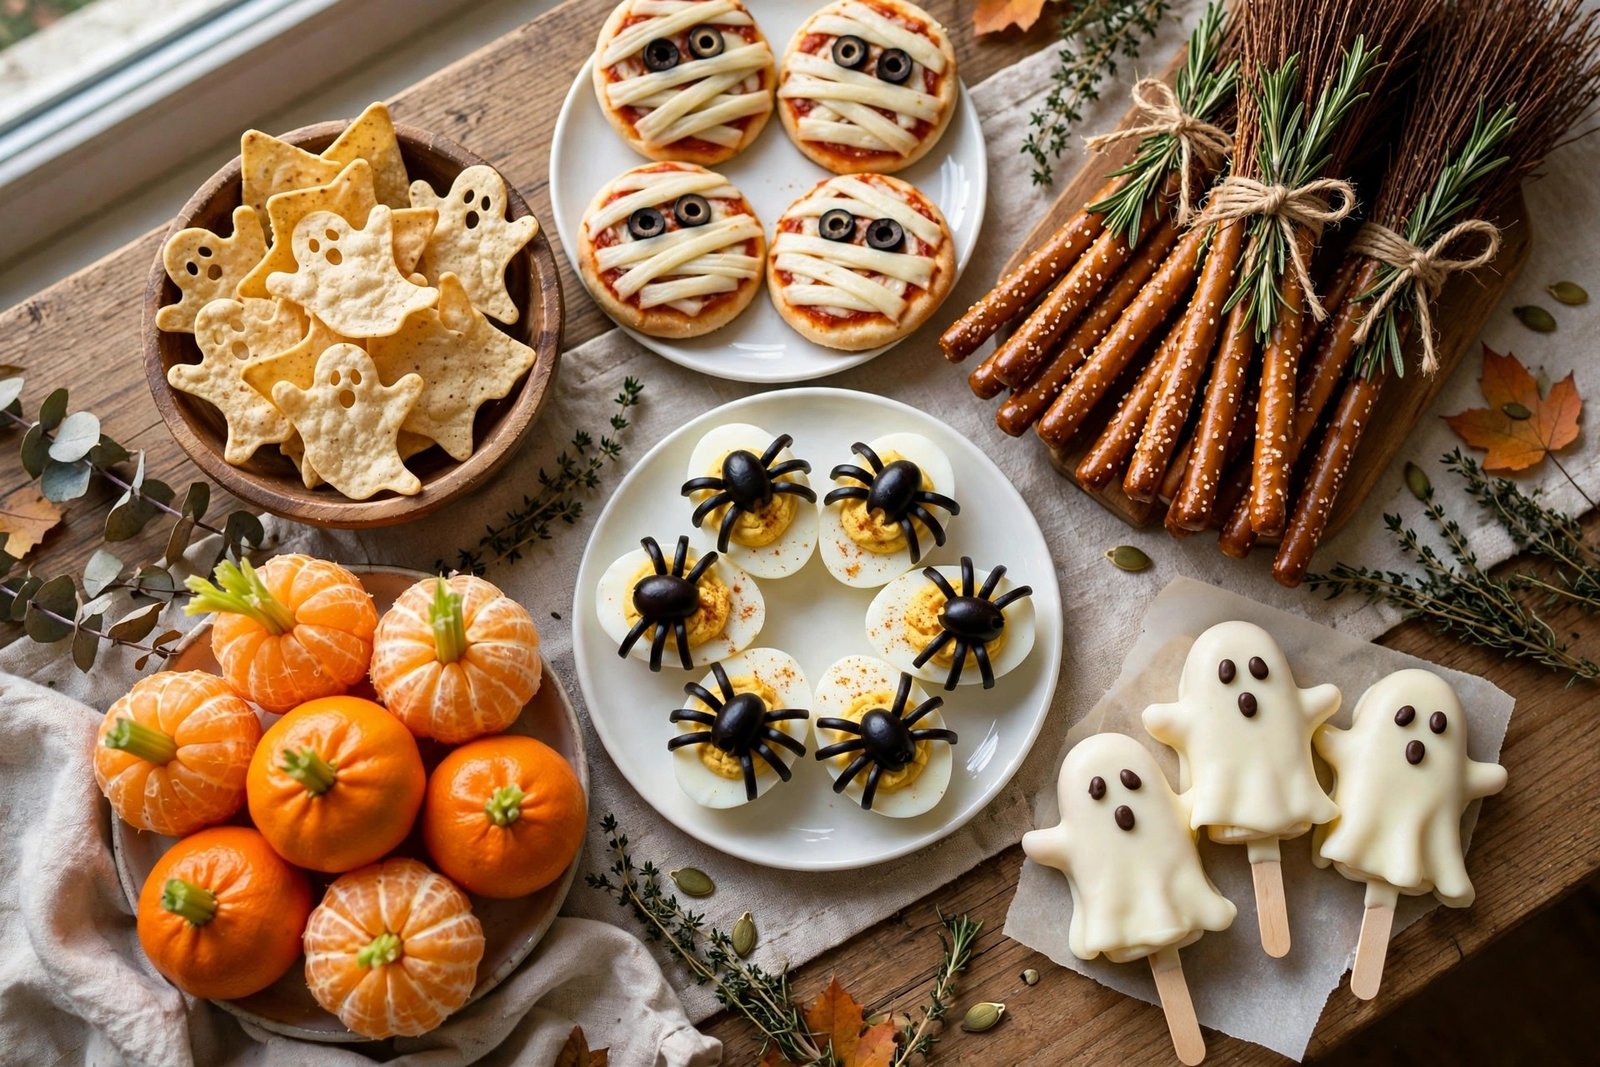
It is the afternoon of the party, there are small ghosts in the hallway, and every adult in the house is busy with costumes, doorbells and a camera that has just run out of charge. This is the table that runs itself. These ten easy Halloween party foods are built for one job: a child in a costume, holding a paper plate in one hand, should be able to take every single one of them with the other hand and keep moving. That is the test every food in this post had to pass, and it is why you will find no bowls that need two hands, nothing that needs cutting up at the table, and nothing that has to be scooped, ladled or carried carefully across the room. Inside you get cheese-string broomsticks on pretzel handles, ghost-shaped tortilla chips baked crisp on a sheet pan, mini pizzas wrapped in cheese-strip bandages, devilled eggs with olive spiders, carved pepper cups, caprese skewers with olive eyeballs, frozen banana ghosts, mandarin pumpkins, shortbread witch fingers, and chocolate dirt cups with a candy pumpkin sitting in the soil. One honest exception, stated up front rather than hidden: the dirt cups in recipe 10 are eaten with a small spoon from the cup. They are the one spoon item in the post — everything else is picked up by hand, exactly as the title promises. If you are searching for halloween food ideas for a party that young guests can actually manage in costume, this is that list. Every food states its prep time, its total time including prep, and its cost per serving, dated October 2026. For a full dinner before the party starts, the slow cooker set in our 12 Easy 5-Ingredient Slow Cooker Dinners can be cooking in the kitchen while this table goes out — load it in the morning and dinner is handled before the first guest arrives.
Quick Facts
- Prep time: 10–25 minutes per food, stated on every recipe below — the banana pops in recipe 7 also need 1 hour in the freezer to set, and that setting time is counted in their total
- Cook time: Only 3 of the 10 foods are baked, all on the one sheet pan: the ghost chips, the mini mummy pizzas and the witch finger cookies. The other 7 are assembly-only, with no cooking at all
- Total time: 10 minutes to 1 hour 30 minutes per food, prep included, depending on the recipe — every total is stated on its recipe
- Servings: Each food makes 12 pieces or 12 small cups unless its recipe states otherwise, written as about 6 to 12 kid snack servings — every recipe states its own count and its own serving size
- Cost per serving: About $0.40–$1.20 per serving — based on standard supermarket prices, October 2026; yours will vary
- Equipment: One large rimmed sheet pan — the one equipment angle for the whole post. The baked foods use it, one batch at a time; the rest are assembly-only. The freezer in recipe 7 is a setting step, not a second appliance angle. A board, a knife, a small bowl, a spoon and a short ghost-shaped cutter or a small sharp knife for recipe 2 are assumed
- Best for: A Halloween party table for young children — classroom parties, front-room parties and pre-trick-or-treat spreads where everything has to be grabbed one-handed, in costume, without help
Why This Works on a Weeknight
- One hand is the whole design. Every food is sized for small hands and built to hold together when it is picked up: a pretzel handle, a pepper you hold by the pepper itself, a skewer, a stick, a cookie. Nothing drips down a costume, nothing needs a fork, and nothing needs an adult standing by to serve it.
- One pan, three bakes, seven no-cook foods. The only cooking in the post happens on one large rimmed sheet pan, in three short batches you can run back to back before guests arrive. Everything else is cut, filled, skewered or chilled, so most of the table can be built while the pan is in the oven.
- The theme is in the shape, not in a shopping list. Ghosts, mummies, spiders, pumpkins and witch fingers are made from ordinary party ingredients — tortillas, cheese, eggs, peppers, bananas, mandarins and shortbread — cut or arranged into shape. There are no specialist moulds to buy and no coloured icing pens that get used once.
- Costs and table times you can plan around. Every food states its cost per serving, dated October 2026, and every chilled food states the same party-table rule: 2 hours maximum out, then back in the fridge or discarded. The full breakdown sits in the What It Costs section below.
The 10 Easy Halloween Party Foods
- Witch Broomstick Pretzels — 20 mins prep, no cook · about $0.55 per serving · makes 24 broomsticks
- Ghost Tortilla Chips — 10 mins prep, 8 mins bake · about $0.40 per serving · makes about 24 chips
- Mini Mummy Pizzas — 15 mins prep, 10 mins bake · about $1.10 per serving · makes 12 mini pizzas
- Spider Devilled Eggs — 20 mins prep, no cook · about $0.80 per serving · makes 12 halves
- Jack-o’-Lantern Pepper Cups — 20 mins prep, no cook · about $1.00 per serving · makes 12 cups
- Eyeball Caprese Skewers — 15 mins prep, no cook · about $1.20 per serving · makes 12 skewers
- Ghost Banana Pops — 20 mins prep, 1 hr freezer set · about $0.70 per serving · makes 12 pops
- Mandarin Pumpkins — 10 mins prep, no cook · about $0.50 per serving · makes 12 pumpkins
- Witch Finger Cookies — 25 mins prep, 12 mins bake · about $0.65 per serving · makes 24 cookies
- Pumpkin Patch Dirt Cups — 15 mins prep, 30 mins chill · about $0.95 per serving · makes 12 cups · the one spoon item
The rules that apply to every recipe below: pantry staples — salt, black pepper, cooking oil and water — are listed separately under every recipe and never counted as bought ingredients. Everything baked in this post bakes on one large rimmed sheet pan, lined with baking paper where the recipe states it; if a batch does not fit in a single layer with a little space around each piece, bake it in two goes on the same pan rather than crowding it, because crowded pieces steam instead of crisping. Perishable foods — the devilled eggs, the pepper cups, the caprese skewers, the pizzas once they have cooled, and the banana pops once they come out of the freezer — spend a maximum of 2 hours on the party table, counted from when they go out, not from when the party starts. After 2 hours they go back in the fridge if they are still within their fridge life, or in the bin if you are not sure; do not put a plate that has sat out back out again later. The practical way to run it is to put half of each chilled food out at the start and keep the rest in the fridge, then swap in the cold second half halfway through the party — the table looks full the whole time and nothing sits out too long. There are no dips among these recipes, on purpose: a child carrying a plate in one hand cannot use one, so every food here is complete as it is picked up.
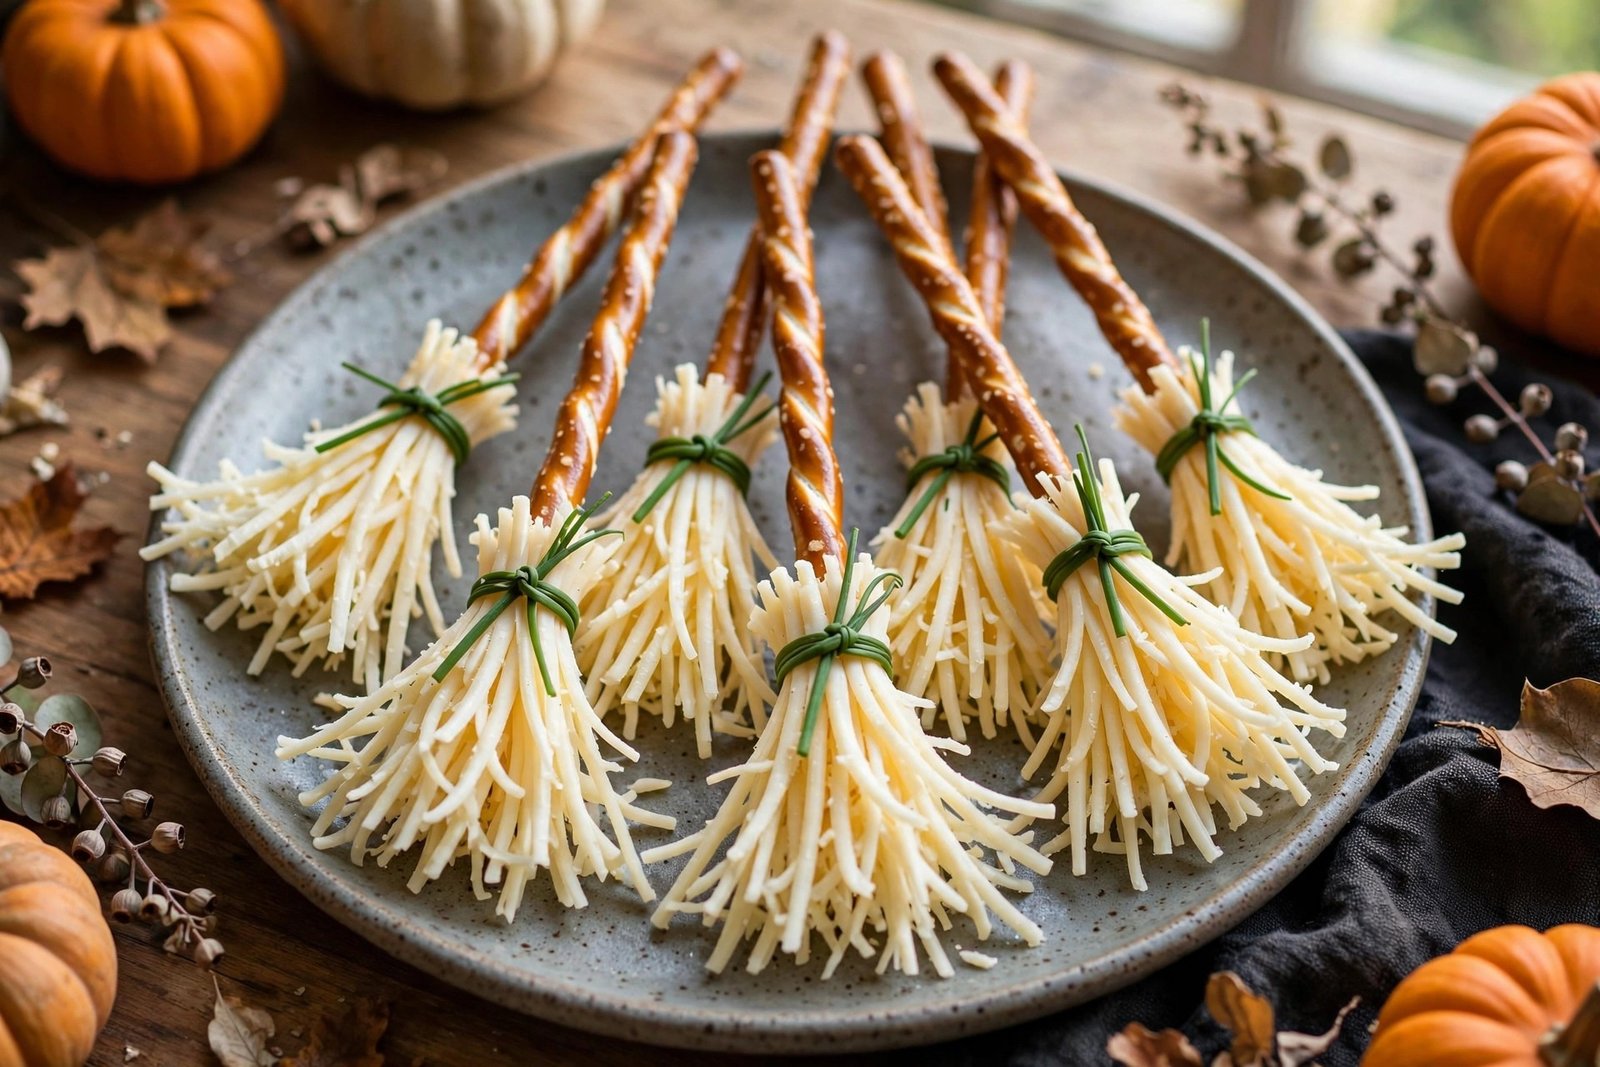
1. Witch Broomstick Pretzels
Ready in: 20 mins prep, no cook · Total 20 mins · About $0.55 per serving (2 broomsticks) · Makes 24 broomsticks · 12 servings
Ingredients
- 24 thin pretzel sticks, about 4 inches (10 cm) long — the broom handles
- 12 cheese strings (string cheese sticks), about 9 oz (255 g) in total — the broom heads
- 24 thin fresh chive stems, or 12 chives cut in half — for tying, optional but it holds the broom together and looks the part
Pantry staples you probably have: salt, black pepper, cooking oil, water — declared here and never counted as bought ingredients. This recipe uses none of them beyond what is already in the cheese and pretzels; they are declared so the rule is the same on every recipe in the post.
Method
- Cut each cheese string in half across the middle, so you have 24 short pieces. Each piece becomes one broom head.
- Working on one piece at a time, use a small sharp knife to cut thin lengthways slits into one end of the cheese, stopping about ½ inch (1 cm) from the other end, so the cut end fans out into strands like the bristles of a broom. Keep the uncut end whole — that is the end the handle goes into.
- Push a pretzel stick gently into the uncut end of each fringed cheese piece, about ½ inch (1 cm) in, so the cheese sits on the end of the stick like a broom head on a handle. If a cheese piece splits, press it back together around the stick with warm fingers — string cheese is forgiving and seals back onto itself.
- Fan the fringed strands out with your fingers so each broom reads as a broom, then, if you are using them, tie one chive stem loosely around the cheese just above the fringe, where the handle meets the head. The tie is decoration and a little extra hold; the broomsticks hold together without it.
- Stand the broomsticks fringe-down on a platter in rows, or lay them flat with the handles angled the same way — flat is the safer arrangement if small hands will be reaching across the table. Serve within the party-table window in the rules above; the cheese is a chilled food, so keep the platter in the fridge until the party starts.
The broomstick is the purest one-hand food in the post: handle, bite, gone. The salty pretzel against the mild cheese is a combination children already know from lunchboxes, and the fringe does all the Halloween work — nothing is dyed, flavoured or decorated with anything that has to be peeled off before eating. Make them last among the chilled foods, because the pretzel softens slowly against the cheese; assembled within a couple of hours of the party, the handles stay crisp.
2. Ghost Tortilla Chips
Ready in: 10 mins prep, 8 mins bake · Total 18 mins · About $0.40 per serving (about 4 chips) · Makes about 24 chips · About 6 servings

Ingredients
- 6 large flour tortillas, about 10 inches (25 cm) each — each tortilla gives about 4 ghosts, depending on your cutter
- 1 tablespoon cooking oil, for brushing — counted here because it is used on the chips themselves, not as a pantry background
Pantry staples you probably have: salt, black pepper, cooking oil, water — declared here and never counted as bought ingredients, apart from the measured spoonful of oil in the ingredients above, which is part of the recipe itself.
Method
- Heat the oven to 375°F (190°C). Line the large rimmed sheet pan with baking paper.
- Stack the tortillas two at a time and cut ghost shapes out of them with a short ghost-shaped cutter, pressing down firmly and twisting very slightly to cut cleanly through both layers. If you do not have a cutter, cut freehand ghost outlines with a small sharp knife or kitchen scissors — a rounded top, a wavy bottom edge, about 3 inches (8 cm) tall. Save the tortilla offcuts: they bake into plain chips on the same pan and nobody at a children’s party objects to an extra plain chip.
- Arrange the ghosts in a single layer on the lined pan, not touching. Brush each one very lightly with oil and sprinkle with a pinch of salt.
- Bake for 6–8 minutes, until the chips are crisp and dry with just the first hint of gold at the edges — flour tortillas colour fast in the last minute, and a ghost should stay pale, so watch the pan from 5 minutes and take them out while they still look ghostly.
- Leave the chips on the pan for 2 minutes to firm up, then lift them onto a platter or into a wide bowl. Serve completely cool or just warm; they keep their crispness for the length of a party at room temperature, and this is one food in the post with no 2-hour fridge rule, because there is nothing perishable in it.
Serving suggestion, and the only one of its kind in this post: put a small bowl of shop-bought salsa alongside the chips for any older children or adults who want it. It is a serving suggestion only — there is no dip recipe in this post, because the chips are written for the one-hand test and a young child with a plate in one hand does not need one. The chips themselves are complete with just oil and salt. At about $0.40 a serving these are the cheapest food on the table, and they carry the theme on shape alone, so make the full batch even if the table looks full — a bowl of ghosts disappears faster than anything else here.
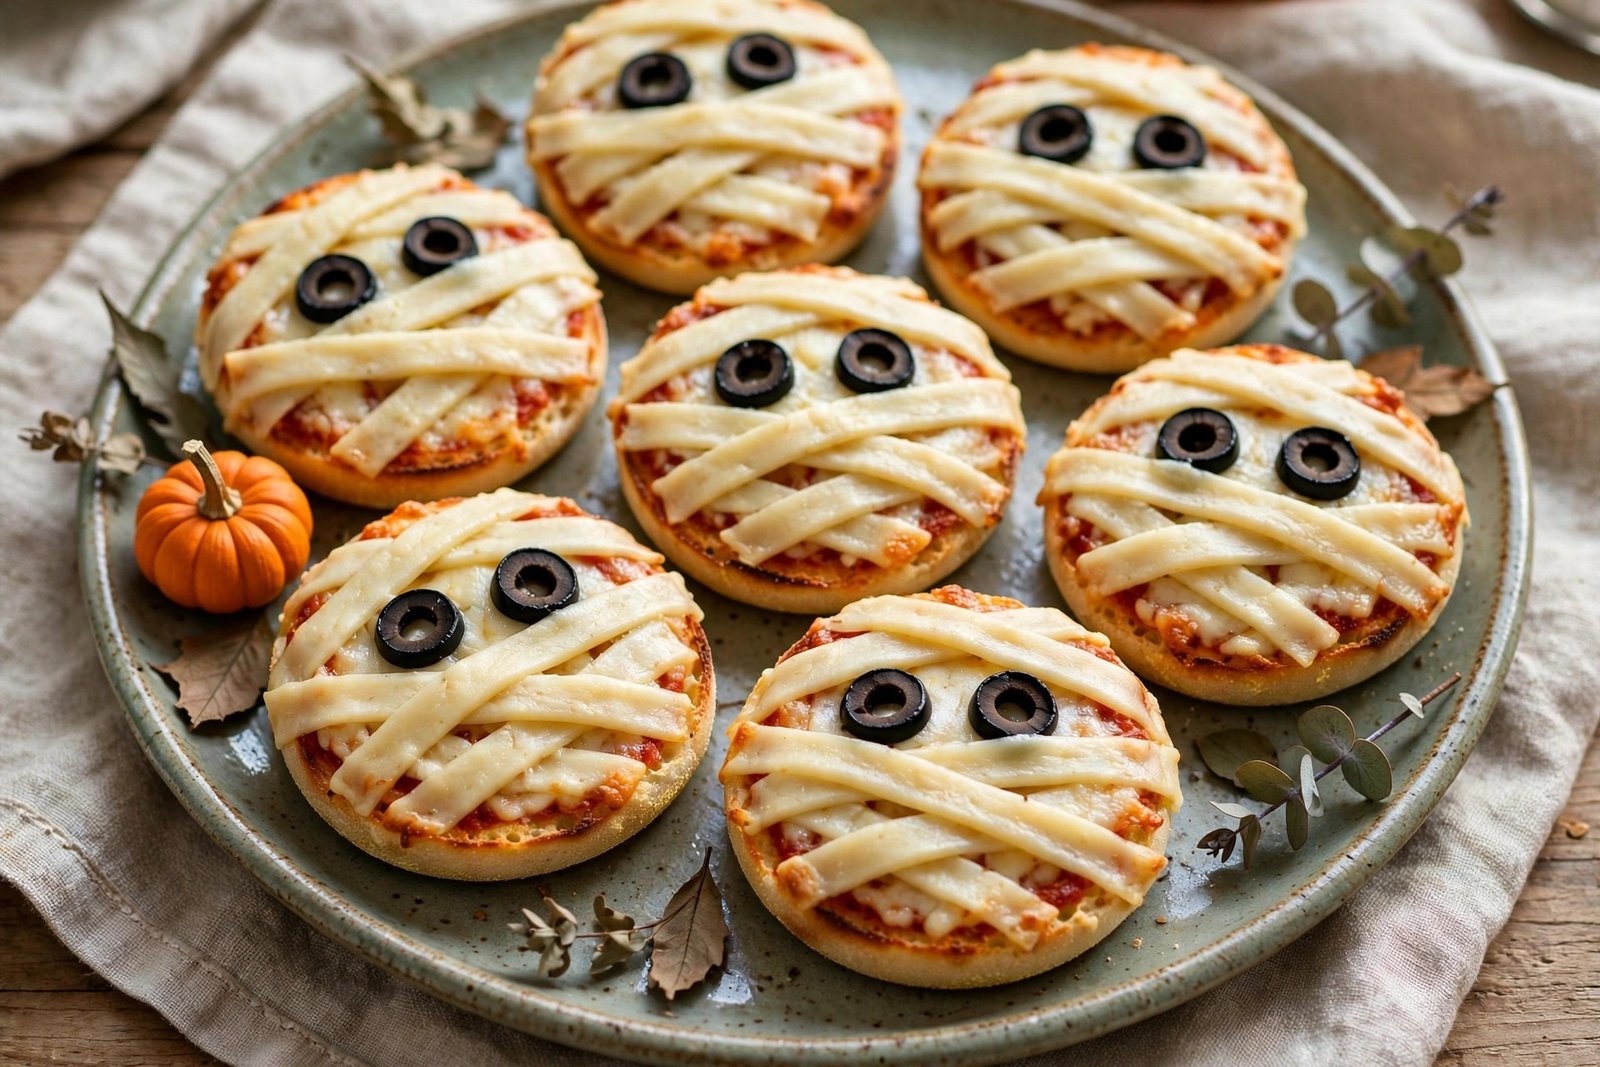
3. Mini Mummy Pizzas
Ready in: 15 mins prep, 10 mins bake · Total 25 mins · About $1.10 per serving (1 mini pizza) · Makes 12 mini pizzas · 12 servings
Ingredients
- 6 English muffins, split in half — 12 bases
- ¾ cup (180 ml) tomato passata or smooth tomato pizza sauce
- 1 teaspoon dried oregano
- 8 oz (225 g) mozzarella cheese, cut into thin strips about ¼ inch (5 mm) wide — the bandages (or 6 cheese slices cut into strips)
- 12 pitted black olives, each sliced in half across the middle — 24 eye pieces
Pantry staples you probably have: salt, black pepper, cooking oil, water — declared here and never counted as bought ingredients.
Method
- Heat the oven to 400°F (200°C). Line the large rimmed sheet pan with baking paper and arrange the 12 muffin halves on it, cut side up, in a single layer.
- Stir the oregano and a pinch of salt into the passata. Spoon about 1 tablespoon of sauce onto each muffin half and spread it nearly to the edges.
- Lay the mozzarella strips across each base in a loose criss-cross, leaving small gaps of sauce showing between the strips and one clear gap near the top of each pizza where the eyes will sit. The strips should overlap the edges of the sauce a little, the way bandages wrap around — neat parallel lines look like a barcode, so angle the strips slightly differently on every pizza.
- Place 2 olive halves, cut side down, in the clear gap on each pizza as the mummy’s eyes, peeking out between the bandages.
- Bake for 8–10 minutes, until the muffin bases are crisp at the edges and the cheese strips have melted and softened into each other but still read as separate bandages. Leave on the pan for 2 minutes, then serve warm. Once the pizzas have cooled to room temperature they join the party-table rule: 2 hours maximum out, then fridge or discard.
Food safety: Serve the pizzas warm from the oven, with the cheese fully melted. Once they have cooled, keep them on the party table for a maximum of 2 hours, then refrigerate or discard them — do not reheat and re-serve pizzas that have already sat out for a full party. Leftovers that went straight into the fridge keep for up to 2 days and reheat on the sheet pan at 375°F (190°C) for 5–6 minutes until piping hot throughout.
One distinction worth making on the page, because this blog already has a pizza-flavoured dip in its game day set: this is a pizza, not a dip — a crisp muffin base a child picks up whole, with bandages of cheese over tomato sauce. It is the heartiest food in the post, the one that stops the table being all snacks, and it is sized so one pizza is a serving. Run this bake first among the three sheet-pan foods if you are cooking them back to back, because the mummies are happiest eaten warmest.
4. Spider Devilled Eggs
Ready in: 20 mins prep, no cook · Total 20 mins, starting from peeled hard-boiled eggs · About $0.80 per serving (2 halves) · Makes 12 halves · 6 servings

Ingredients
- 6 large eggs, hard-boiled, peeled and completely cold — boil them up to 2 days ahead and keep them chilled, peeled on the day
- 3 tablespoons shop-bought mayonnaise — shop-bought is specified on purpose, see the safety note below; do not use a homemade raw-egg mayonnaise for a children’s party plate
- 1 teaspoon mild mustard (yellow or Dijon)
- 1 teaspoon white wine vinegar or lemon juice
- 18 pitted black olives — 12 halves for the spider bodies, the rest cut into thin strips for the legs
Pantry staples you probably have: salt, black pepper, cooking oil, water — declared here and never counted as bought ingredients.
Method
- Cut each peeled egg in half lengthways and pop the yolks out into a small bowl, keeping the white halves whole. Arrange the empty whites on a platter, cut side up — a tiny slice off the rounded bottom of any white that wobbles will level it.
- Mash the yolks with a fork until they are fine crumbs, then stir in the shop-bought mayonnaise, mustard, vinegar or lemon juice and a pinch of salt until the filling is smooth and pale yellow. Taste it: devilled egg filling should be a little sharper than you expect, because it is eaten cold in two bites.
- Spoon or pipe the filling back into the white halves, mounding it slightly. A teaspoon gives a homely mound; a piping bag or a food bag with the corner snipped gives a smooth dome the spider sits on better.
- Build the spiders on top: press one olive half, cut side down, into the centre of each filled egg as the body. Cut the remaining olives into thin strips and tuck 8 strips — 4 a side — around each body as legs, pressing the ends lightly into the filling so they stay put when the plate is carried.
- Cover the platter and chill it until the party starts. Put the eggs out last among the chilled foods and note the time they went out — of everything on this table, these are the food the 2-hour rule matters most for.
Food safety: Use shop-bought mayonnaise for the filling, as the ingredients state — no homemade raw-egg mayonnaise on a children’s party table. Keep the finished eggs chilled until serving, put them on the table for a maximum of 2 hours, and discard any that are left after that window rather than refrigerating and re-serving them; eggs that went out and came back are not a leftover, they are finished. Unserved eggs that stayed in the fridge keep for up to 2 days, covered.
The spider is eight olive strips and one olive half, and it transforms the plainest party food on the table into the one children point at. Devilled eggs are also the most adult-friendly food here, which matters at a children’s party more than recipes admit: the grown-ups standing around the edges eat these while the small ghosts work through the broomsticks. Make exactly the batch stated unless your party is large — eggs are the food you least want left over in quantity.
5. Jack-o’-Lantern Pepper Cups
Ready in: 20 mins prep, no cook · Total 20 mins · About $1.00 per serving (2 mini cups) · Makes 12 cups · 6 servings

Ingredients
- 12 mini sweet peppers, orange if you can get them — yellow and red work too, orange reads most like a pumpkin
- 8 oz (225 g) cream cheese, at room temperature so it mixes and fills cleanly
- 2 tablespoons finely snipped fresh chives, plus extra for sprinkling on top
- 1 small clove garlic, very finely minced, or ¼ teaspoon garlic granules
- 1 teaspoon lemon juice
Pantry staples you probably have: salt, black pepper, cooking oil, water — declared here and never counted as bought ingredients.
Method
- Cut the top off each mini pepper, keeping the green stem attached to the top piece if there is one — that top goes back on as the pumpkin’s lid at an angle. Scoop the seeds out with a teaspoon and stand the peppers upright; trim a sliver off the base of any pepper that will not stand.
- Carve the faces before you fill the peppers — carving a filled pepper is a mess. With the tip of a small sharp knife (an adult job, done at the counter before the party, never a table activity), cut two small triangle eyes and a small smiling or zigzag mouth into one side of each pepper, cutting just through the wall. Small cuts read better than big ones, and a face that is slightly wonky reads as charm on a pumpkin, not as a mistake.
- Beat the cream cheese in a bowl with the chives, garlic, lemon juice and a pinch of salt and black pepper until it is soft, speckled green and spoonable.
- Spoon or pipe the filling into each pepper up to the brim, mounding it very slightly. Sit the pepper tops back on at a tilt, like lids left ajar, and sprinkle a few extra chives over the platter.
- Cover and chill until serving. The peppers themselves are the handle — a child picks the cup up by its walls and eats filling and pepper together, which is exactly the one-hand test this post is built on.
Food safety: The cream cheese filling makes this a perishable food: keep the filled cups chilled until the party starts, keep them on the table for a maximum of 2 hours, then refrigerate any untouched cups or discard them. Unserved cups that stayed in the fridge keep for up to 2 days, though the carved faces soften a little after the first day. Fill the peppers on the day of the party, not the night before — a pepper filled overnight weeps into its own filling.
These are the most decorative food in the post and the one that takes the fiddliest twenty minutes, and they earn it: a platter of twelve little grinning pumpkins does more for the look of the table than any shop-bought decoration standing behind it. Orange mini peppers are a standard supermarket item in October, and the filling is a plain herbed cream cheese with no heat in it — the garlic is there in a small, background quantity, and it can be left out entirely for very young children without changing the method.
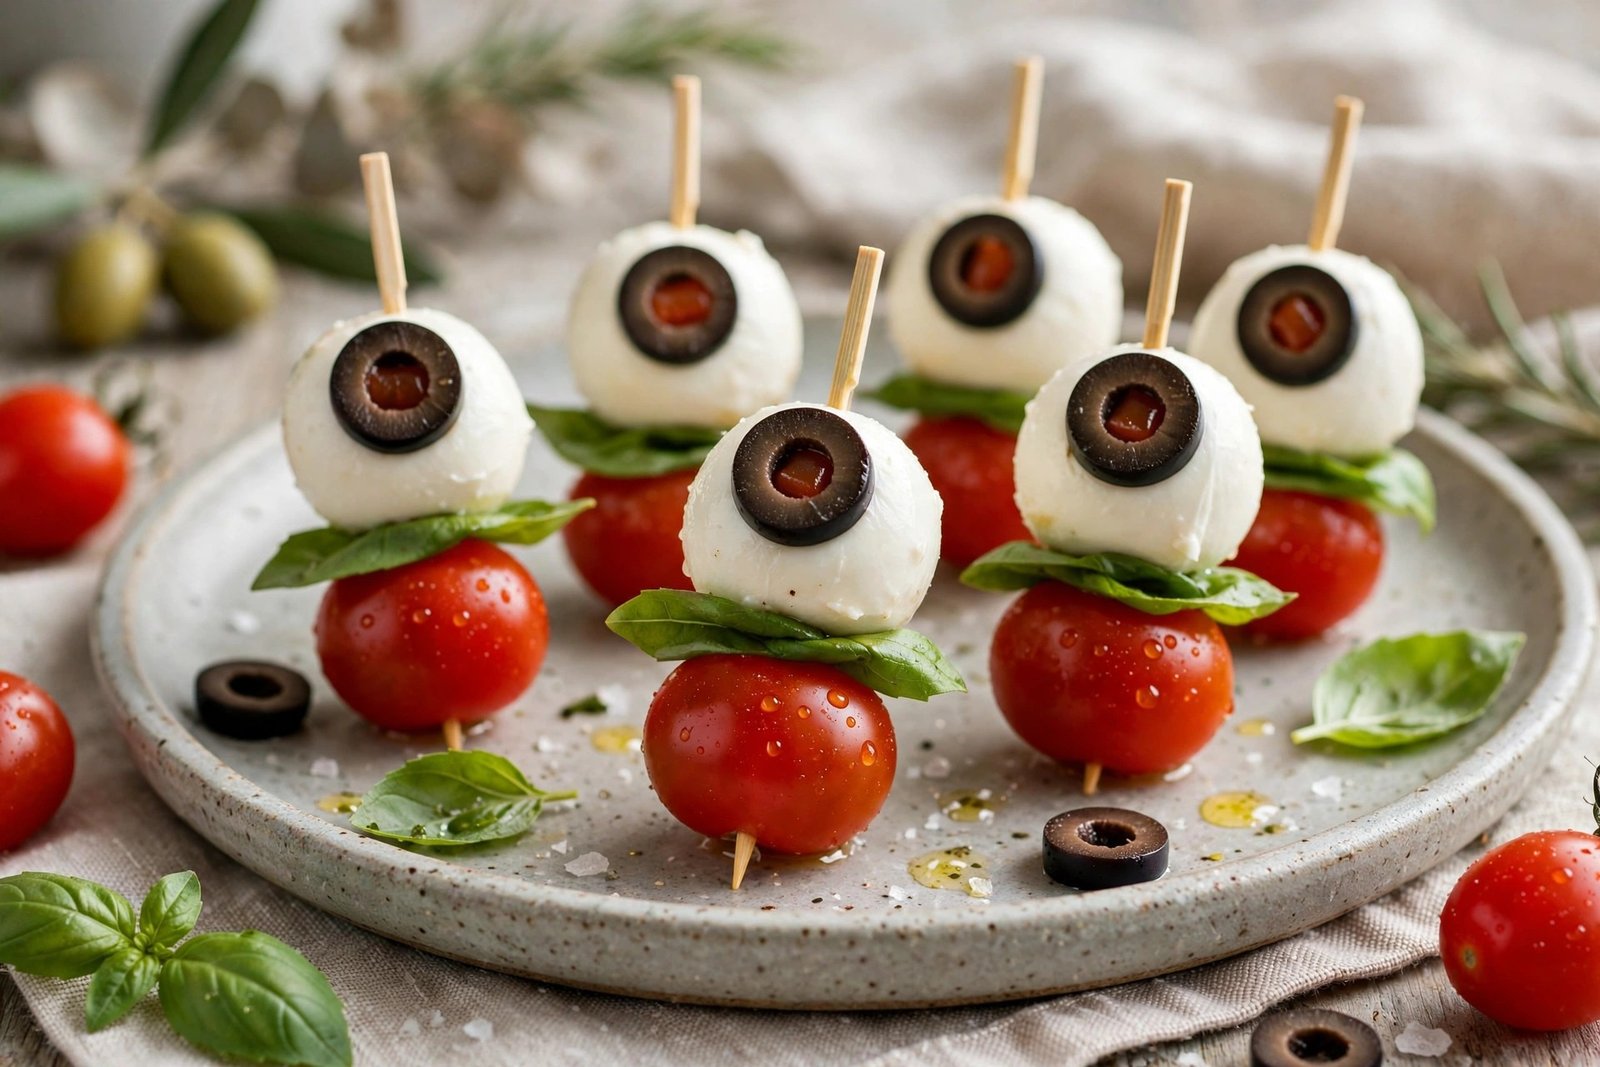
6. Eyeball Caprese Skewers
Ready in: 15 mins prep, no cook · Total 15 mins · About $1.20 per serving (2 skewers) · Makes 12 skewers · 6 servings
Ingredients
- 12 small mozzarella balls (bocconcini or ciliegine size), about 8 oz (225 g) drained — the eyeballs
- 12 pitted green or black olives, each cut into 3 slices — the middle slice of each olive becomes the iris
- 12 cherry tomatoes, halved
- 12 small fresh basil leaves
- 12 short wooden cocktail skewers, about 4 inches (10 cm) — short is deliberate, see the method
Pantry staples you probably have: salt, black pepper, cooking oil, water — declared here and never counted as bought ingredients. A single drop of olive oil from the pantry, touched onto each olive slice, is the fix in step 2 if a slice will not stay on its mozzarella ball.
Method
- Drain the mozzarella balls and pat them dry on kitchen paper — a dry surface is what lets the eyeball sit on the ball instead of sliding off it.
- Press one olive slice, cut side out, onto the front of each mozzarella ball as the iris of the eye. If a slice slips, touch the back of it with the smallest drop of olive oil and press again for a few seconds. The eyeball does not need to survive the whole party in perfect condition — it needs to read as an eye when the platter goes out.
- Thread each skewer in this order: a cherry tomato half first, then a basil leaf folded over, then the mozzarella eyeball with its olive slice facing outward, so the finished skewer shows tomato, green leaf, and a white eyeball staring off the end.
- Arrange the skewers on a platter in a single layer with the eyeballs facing up and the skewer ends pointing the same way, so a child takes one by its stick without disturbing the rest. Use short skewers and rounded-end cocktail sticks where you can, and lay this platter where an adult can see it — the stick is part of the food, and at a young children’s party it is the one item in the post worth an adult keeping half an eye on.
- Cover and chill until serving. These skewers are at their best made within a few hours of the party: the basil darkens slowly once it is cut and threaded, and the eyeball stays put best on a freshly dried ball.
Food safety: Fresh mozzarella is a perishable cheese: keep the skewers chilled until the party starts, keep them on the table for a maximum of 2 hours, then refrigerate any untouched skewers or discard them. Unserved skewers that stayed in the fridge are best eaten the same day. Do not freeze this recipe — fresh mozzarella turns grainy and weeps when it thaws.
At $1.20 a serving these are the most expensive food in the post, and the mozzarella is the whole reason — it is also why there are twelve skewers rather than twenty-four. On the table they earn their place as the one fresh, cold, tomato-and-basil bite among the bakes and the sweet foods, and the eyeball is a ten-second piece of assembly rather than a decoration project. If your party is mostly children under five, thread the same three pieces without the skewer and serve them as eyeball bites in a paper cupcake case instead — same food, no stick, stated as a swap below as well.
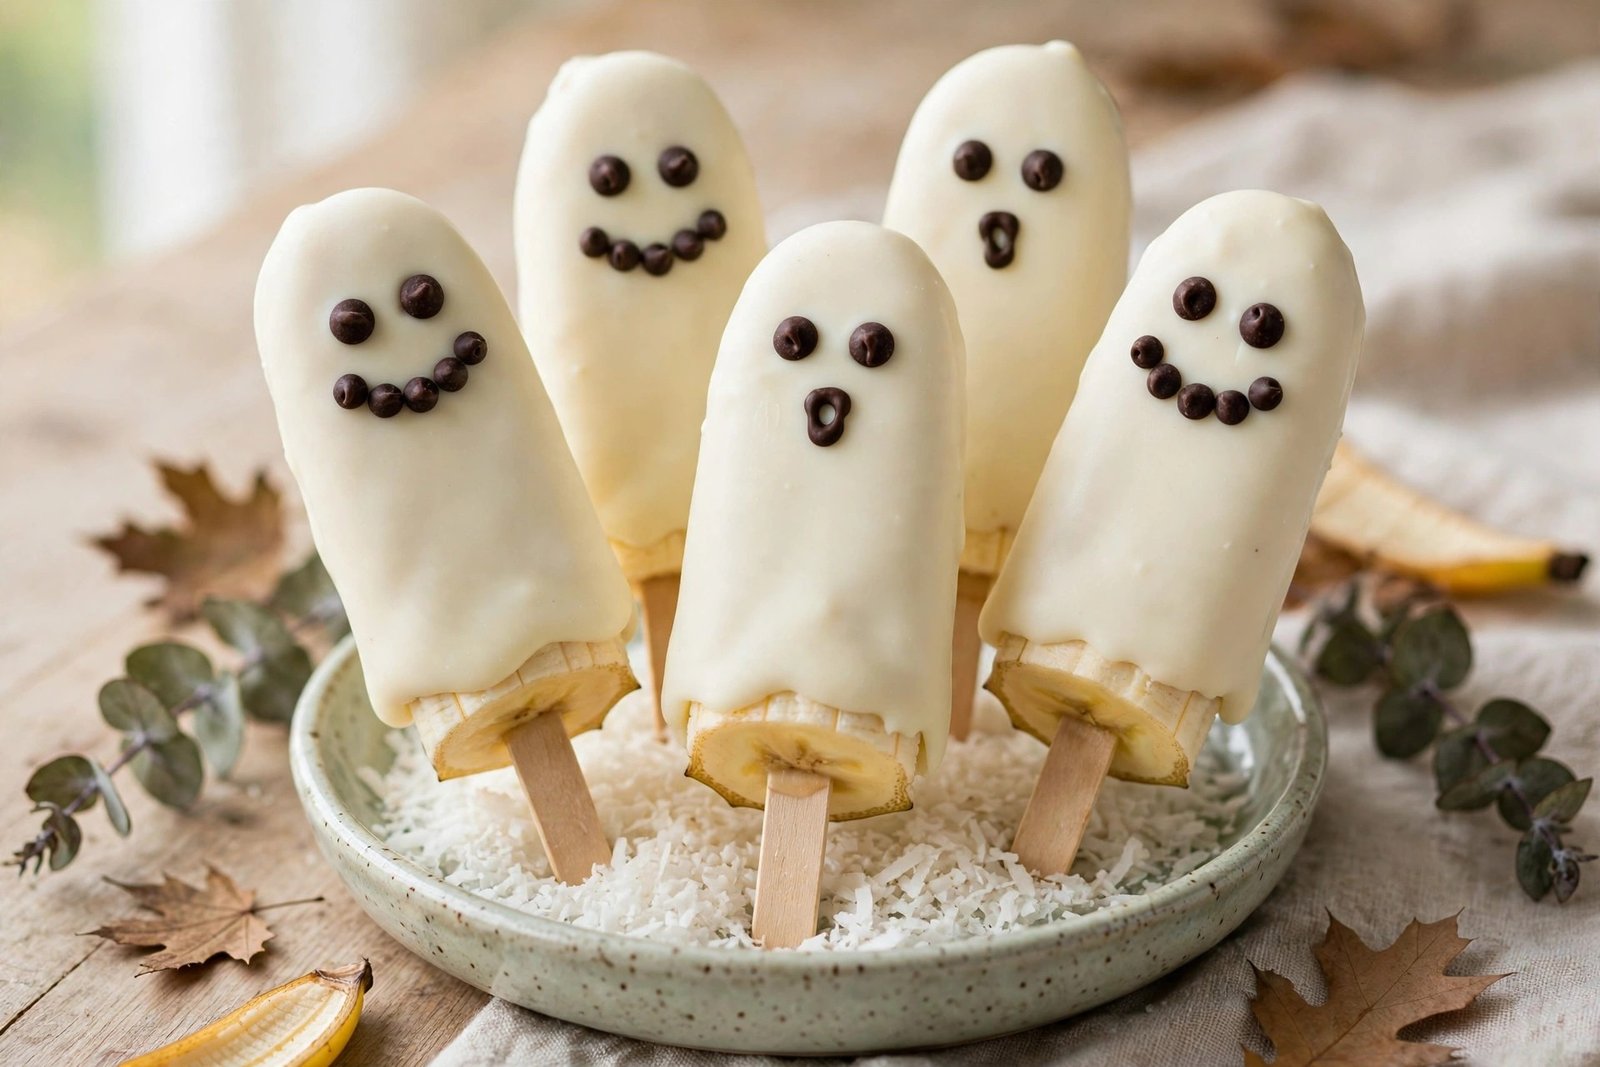
7. Ghost Banana Pops
Ready in: 20 mins prep, 1 hr freezer set · Total 1 hr 20 mins · About $0.70 per serving (1 pop) · Makes 12 pops · 12 servings
Ingredients
- 6 just-ripe bananas — firm and yellow with no soft spots; an over-ripe banana will not hold its stick
- 1½ cups (360 g) thick plain Greek yoghurt, full-fat if you can get it — thick yoghurt coats and sets; thin yoghurt slides off (or 7 oz / 200 g white chocolate, melted, as the coating swap stated in the method)
- 1 tablespoon honey or maple syrup, stirred into the yoghurt — optional, and left out entirely for children under one year old
- 36 small dark chocolate chips — 3 per ghost, for two eyes and a mouth
- 12 wooden lolly sticks or short skewers
Pantry staples you probably have: salt, black pepper, cooking oil, water — declared here and never counted as bought ingredients.
Method
- Line the large rimmed sheet pan with baking paper — the pan does double duty in this post, as the freezer tray here as well as the baking pan elsewhere. Peel the bananas, cut each one in half across the middle, and push a lolly stick into the cut end of each half, about 1½ inches (4 cm) in, so each half stands as a pop with a rounded ghost top.
- Stir the honey or maple syrup into the yoghurt if you are using it. Holding each pop by its stick, spoon the yoghurt over the banana and turn the pop so it is coated all over, letting the excess drip back into the bowl — a thinner, even coat sets better than a thick one, and the ghost shape is the banana’s own shape, so the coating just needs to make it white. If you are using white chocolate instead, melt it in a heatproof bowl, let it cool for 2 minutes so it does not slide straight off, and coat in exactly the same way.
- Lay the coated pops on the lined pan with space between them and press 2 chocolate chips into each one as eyes and 1 below as a small round mouth, while the coating is still wet.
- Put the pan in the freezer for at least 1 hour, until the coating is firm and the banana is frozen just through at the surface. The freezer here is a setting step — it firms the coating so the pop can be held by its stick; it is not a second cooking appliance and nothing in this recipe is baked.
- Serve the pops straight from the freezer, standing upright in a block of polystyrene, a halved pumpkin or a jug of uncooked rice if you have one, or laid flat on a chilled platter. Once they are out, the coating softens — treat them with the same 2-hour party-table maximum as the other chilled foods, and expect them in practice to be at their best in the first 30 minutes, which is why they work so well brought out as a second wave when the party needs a lift.
Food safety: Keep the pops frozen until the moment they go out. Once out, keep them on the table for a maximum of 2 hours and discard any that are left softened at the end rather than refreezing them — a banana pop that has thawed and been refrozen comes back with a grey, icy coating. Pops that stayed in the freezer keep for up to 1 week, wrapped, though the banana darkens slightly under its coating after the first few days.
The ghost here is, again, a shape the ingredient already has: a halved banana is tall, rounded at the top and straight at the base, and a white coat and three chocolate chips are all it takes. Serve these to children who are old enough for a frozen pop on a stick, and cut the same coated banana into coins for the very youngest guests instead — same ghost-white pieces, no stick and no large frozen mouthful.
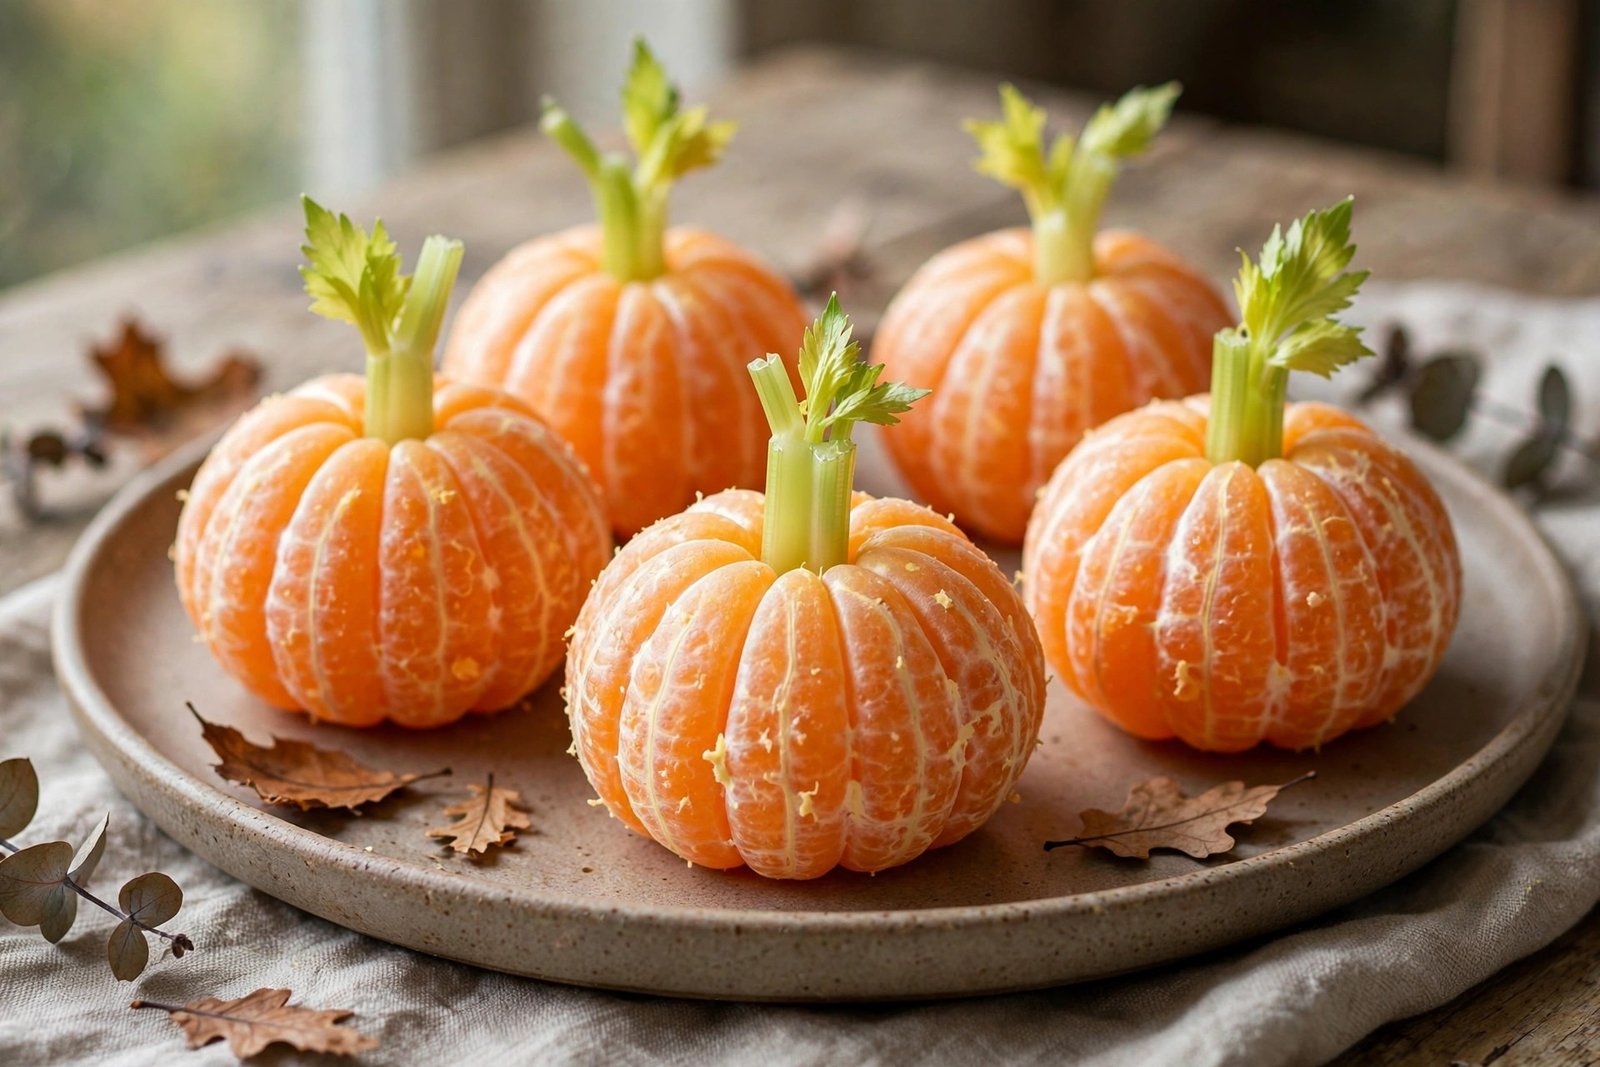
8. Mandarin Pumpkins
Ready in: 10 mins prep, no cook · Total 10 mins · About $0.50 per serving (1 pumpkin) · Makes 12 pumpkins · 12 servings
Ingredients
- 12 mandarins, clementines or satsumas — easy-peel fruit, unblemished if you can manage it, because the fruit itself is the decoration
- 1 celery stick, cut into 12 small stem pieces, each about ½ inch (1 cm) long and thin
Pantry staples you probably have: salt, black pepper, cooking oil, water — declared here and never counted as bought ingredients. This recipe uses none of them; they are declared so the rule is the same on every recipe in the post.
Method
- Peel the mandarins, keeping each fruit whole. Pick off the white pith strands as you go — a clean orange surface is what makes these read as pumpkins rather than as peeled fruit.
- Cut the celery stick into 12 short, thin pieces. Celery is specified because it is green, firm and already in most fridges in October; a small piece of green bean, a sliver of cucumber skin or a tiny parsley stem all do the same job if celery is not in the house.
- Push one celery piece gently into the top centre of each mandarin as the pumpkin’s stem, pushing just far enough that it stands. The natural dimple at the top of the fruit takes the stem without any cutting.
- Arrange the pumpkins in a cluster on a platter or straight on the table as a pumpkin patch at one end of it. They hold at room temperature for the length of a party with no fridge rule attached — peeled fruit dries slowly at the surface, so peel them within a few hours of the party rather than the night before.
This is the simplest food in the post — two ingredients, ten minutes, no cooking, no chilling, no decoration that comes off — and on a table of ghosts and spiders it is the one that reads instantly from across the room. Put the pumpkin patch where the youngest children can reach it: a whole peeled mandarin is a serving a two-year-old can pick up, carry and eat segment by segment with one hand free, and it balances a table that is otherwise mostly cheese, egg and chocolate. Buy two extra mandarins beyond the twelve — one always tears on peeling, and one is always eaten by whoever is assembling the table.
9. Witch Finger Cookies
Ready in: 25 mins prep, 12 mins bake · Total 37 mins · About $0.65 per serving (2 cookies) · Makes 24 cookies · 12 servings

Ingredients
- 1 cup (225 g) unsalted butter, at room temperature
- ¾ cup (90 g) icing sugar (confectioners’ sugar)
- 1 teaspoon vanilla extract
- 2¼ cups (280 g) plain flour (all-purpose flour)
- 24 whole blanched almonds, or 24 large almond slices — THE NAILS: these are almonds, a tree nut, stated plainly here because it matters at a children’s party; see the nut-free swap directly under this recipe and in the swaps section
- 1 tablespoon seedless raspberry or strawberry jam — a dab under each nail and a smear at the cut end, optional and strictly decoration
Pantry staples you probably have: salt, black pepper, cooking oil, water — declared here and never counted as bought ingredients, apart from the pinch of salt in step 1, which is part of the dough.
Method
- Beat the butter and icing sugar together in a large bowl until pale and soft, then beat in the vanilla and a pinch of salt. Stir in the flour until the mixture forms a soft dough, then bring it together with your hands. Chill the dough for 15 minutes of the prep time if it is very soft — a firm dough shapes into far better fingers.
- Heat the oven to 350°F (175°C). Line the large rimmed sheet pan with baking paper.
- Take a heaped teaspoon of dough at a time and roll it on the counter into a finger: about 3 inches (8 cm) long, thinner than your own finger, slightly knobbly rather than smooth. Squeeze the roll gently in two places to make knuckle bumps, and score two or three shallow lines across each knuckle with the back of a knife. A perfect, smooth finger looks like a breadstick — the knuckles are what sell the witch.
- Press one almond, pointed end out, into the tip of each finger as the nail, pressing firmly so it bakes in. If you are making the nut-free version, shape all the fingers exactly the same way and leave the nails off at this stage — the swap goes on after baking, in the note under this recipe.
- Arrange the fingers on the lined pan with space between them and bake for 10–12 minutes, until set and very pale gold at the edges — a witch finger should stay pale, so take them out before they brown. Cool on the pan for 5 minutes, then lift them onto a rack. Once cool, a tiny dab of jam under a loosened nail, or a smear at the cut end, is decoration enough; the cookies keep at room temperature in a tin for up to 4 days, so these can be baked well ahead of the party.
Nut note — read this one, it is not optional at a children’s party: the nail on the standard version is an almond, which is a tree nut. State it on a small card on the platter (“witch fingers — almond nails”) so no parent has to guess. For a nut-free table, or for any party where you do not know every child’s allergies, make the swap instead: skip the almond entirely and press a single pumpkin seed or sunflower seed into the tip of each finger before baking as the nail, or press a halved dark grape, cut side down, onto the tip of each cooled cookie with a dab of jam to hold it. Both read clearly as a nail, both bake or sit exactly where the almond would, and a table where every child can take every food is worth more than the almond. If you make both versions, plate them separately and label both platters.
These are the make-ahead heroes of the post: a plain, sturdy shortbread that keeps for four days in a tin, shaped in the one form that no other cookie on the table will be mistaken for. The dough is deliberately low in sugar for a party cookie, because the table around it carries chocolate dirt cups and banana pops — the fingers are the plain, buttery bite in between, and children eat them at the same rate as everything sweeter on the table.
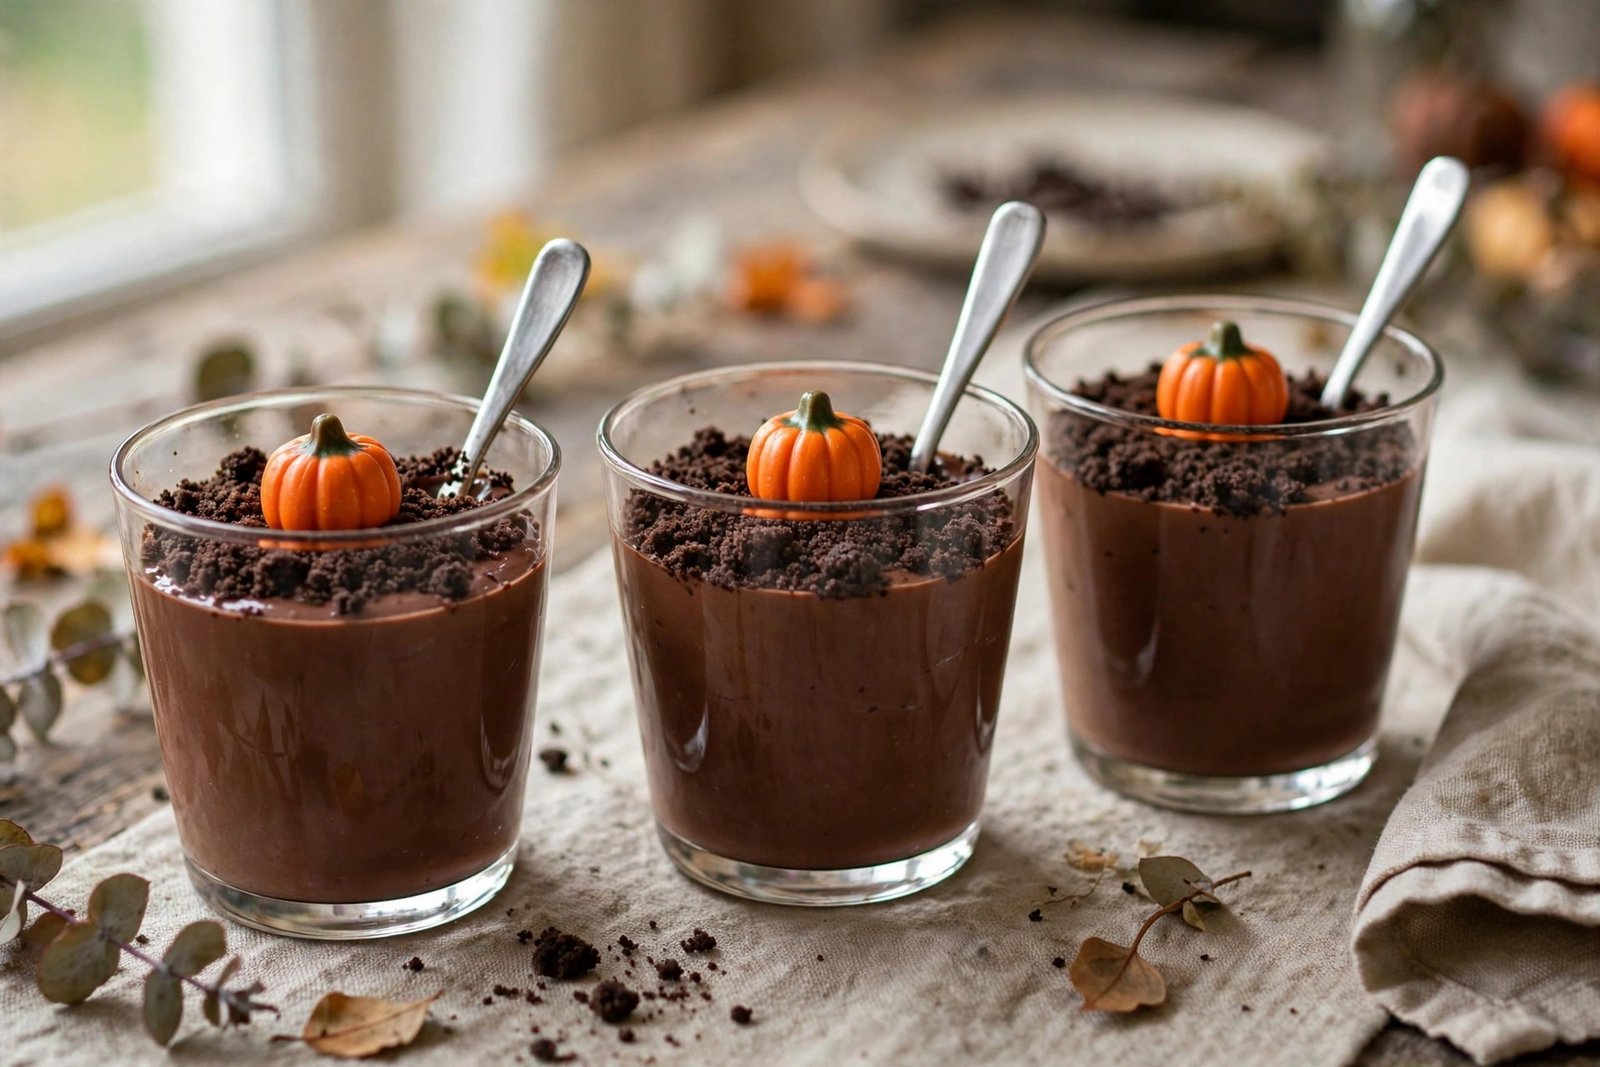
10. Pumpkin Patch Dirt Cups
Ready in: 15 mins prep, 30 mins chill · Total 45 mins · About $0.95 per serving (1 cup) · Makes 12 cups · 12 servings · The one spoon item in the post, flagged in the intro
Ingredients
- 2 packets instant chocolate pudding mix, each making about 4 servings (about 3.9 oz / 110 g per packet), made up with cold milk exactly as the packet directs — about 4 cups (960 ml) cold milk in total
- 12 chocolate sandwich cookies, crushed to crumbs — the soil (or the same weight of plain chocolate biscuits, crushed)
- 12 candy pumpkins (mellowcreme pumpkins) — 1 per cup, sitting in the soil
- 12 small clear plastic cups or small glasses, about 5 oz (150 ml) each — clear matters, because the layers are the point
- 12 small spoons — one per cup, put in the cups before they go out, see the method
Pantry staples you probably have: salt, black pepper, cooking oil, water — declared here and never counted as bought ingredients. This recipe uses none of them; they are declared so the rule is the same on every recipe in the post.
Method
- Whisk the pudding mixes and the cold milk together in a large bowl for the time the packet states, then leave the pudding for 5 minutes to thicken to a soft set. Instant pudding is specified because it needs no cooking and no egg — the cup is assembled cold, which keeps this recipe inside the post’s sheet-pan-and-assembly rule.
- Put the cookies in a food bag and crush them with a rolling pin to a crumb that looks like soil — mostly fine crumbs with a few small lumps left in, which read as stones in a pumpkin patch.
- Spoon the pudding into the 12 cups, filling each one about two-thirds full and levelling the top with the back of the spoon. Sprinkle a thick, even layer of cookie crumb over each cup, right to the edges, so no pudding shows through the soil.
- Sit one candy pumpkin on top of each cup, pressing it very slightly into the crumbs so it stays put when the cup is carried.
- Chill the cups for at least 30 minutes before the party. Put a small spoon in each cup as you set them out. This is the honest exception flagged in the intro: the dirt cup is carried in one hand and eaten with a small spoon from the cup — it is not finger food, and the post does not pretend otherwise. It earns its place as the table’s one sit-down dessert, the food that slows the party down for five minutes near the end.
Food safety: The pudding is a milk-based, perishable filling: keep the finished cups chilled until serving, keep them on the table for a maximum of 2 hours, and discard any that are left after that window. Unserved cups that stayed in the fridge keep for up to 2 days, with the crumb layer softening after the first day — add the soil and the candy pumpkin on the day for any cups you are holding back as a second wave.
A dirt cup is a pumpkin patch in a glass: dark soil, one round orange pumpkin, nothing else needed. Because the cups are clear, children can see the chocolate layer under the soil before they start, which settles the only question a dirt cup ever raises. Make them in the cups they will be served in and move them once, on a tray, from fridge to table — a filled cup carried individually across a busy room in one small hand is the one spill this post has honestly not designed out.
What It Costs
Based on prices checked in October 2026 at a large US supermarket. Your cost will vary by store and season — the point is the ballpark, not the penny. Per serving, with every recipe’s own serving size as stated on its recipe: Ghost Tortilla Chips about $0.40, Mandarin Pumpkins about $0.50, Witch Broomstick Pretzels about $0.55, Witch Finger Cookies about $0.65, Ghost Banana Pops about $0.70, Spider Devilled Eggs about $0.80, Pumpkin Patch Dirt Cups about $0.95, Jack-o’-Lantern Pepper Cups about $1.00, Mini Mummy Pizzas about $1.10, and Eyeball Caprese Skewers about $1.20. The full set runs from $0.40 to $1.20 a serving — the baked tortilla ghosts at the cheap end, the fresh mozzarella at the top. Made in full, one batch of all ten foods is 120 pieces and small cups across the table, at a total ingredient cost of roughly $52 on the same October 2026 prices — and in practice most parties need only six or seven of the ten, which brings a full table in at roughly $32–$38. The serving bases are honest about what they cover: every figure is the food itself as it is picked up, with no sides to add, because a party food that needs something bought alongside it is not the price on its label. The shop-bought salsa suggested alongside recipe 2 is an optional extra for adults and is not counted in any figure in this post.
Storage & Reheating
- The party-table rule, restated once where it belongs: perishable foods — the broomstick cheese once assembled, the devilled eggs, the pepper cups, the caprese skewers, the dirt cups, the banana pops once out of the freezer, and the mummy pizzas once cooled — spend a maximum of 2 hours on the table, then go back in the fridge or in the discard pile. The working method is a half batch out and a half batch held cold, swapped halfway through. Foods with nothing perishable in them — the ghost chips, the mandarin pumpkins and the finger cookies — carry no such clock.
- Fridge: Devilled eggs keep for up to 2 days covered, and are not re-served after a spell on the table, as their recipe states. Filled pepper cups keep for up to 2 days. Caprese skewers are best the day they are made. Unserved dirt cups keep for up to 2 days, with fresh crumb added on the day if you held them back. Assembled broomsticks keep for 1 day, though the pretzel softens — the cheese and the pretzels each keep far longer apart than together.
- Freezer: The banana pops are the freezer food — up to 1 week wrapped, served straight from frozen. Nothing else in the post freezes well: fresh mozzarella turns grainy, filled peppers weep, devilled eggs go rubbery, and a dirt cup’s crumb layer is ruined by thawing. The finger cookie dough, by contrast, freezes very well for up to 3 months — shape the fingers, freeze them on the pan, bag them, and bake from frozen with 2 extra minutes when a party is coming.
- Reheating: Only the baked foods ever need it. Mummy pizzas reheat on the sheet pan at 375°F (190°C) for 5–6 minutes until piping hot throughout, and only if they went into the fridge promptly and never sat out for a full party. Ghost chips that have softened refresh on the same pan at 350°F (175°C) for 3 minutes and are crisp again. Everything else is served cold, chilled or frozen, exactly as its recipe states.
- Make-ahead order that works: finger cookies up to 4 days ahead; eggs boiled up to 2 days ahead and filled on the day; dirt cup pudding made and cupped on the morning, with soil and pumpkins added before the party; banana pops frozen the day before; pepper faces carved and caprese eyeballs assembled on the day; broomsticks and mandarin pumpkins in the last 2 hours; the three sheet-pan bakes run last, back to back, in the hour before guests arrive.
Easy Swaps & Variations
- Nut-free witch fingers (the important swap): leave the almond off entirely and use a pumpkin seed or sunflower seed pressed into the tip before baking, or a halved dark grape held on a cooled cookie with a dab of jam, exactly as recipe 9 states. Label the platter either way at a children’s party, and plate mixed versions separately.
- Coating swap for the banana pops: melted white chocolate instead of yoghurt, in the same quantity and by the same method in recipe 7 — it sets harder and sweeter, tolerates a warm room a little longer, and turns the pop into a dessert where the yoghurt version is a frozen snack. Yoghurt is the better coating for very young children because it stays softer when frozen.
- No-skewer caprese: the same mozzarella ball, olive slice, tomato half and basil, served unthreaded in a paper cupcake case per child, as recipe 6 suggests — the right version for a party of under-fives, and the case keeps the eyeball facing up without any stick at all.
- Flavour swaps that keep the shapes: herbed cream cheese in the pepper cups swaps for a plain cream cheese beaten with very finely chopped roasted red pepper for a speckled orange filling; the mummy pizza sauce swaps for a thin layer of tomato and basil passata; the dirt cup soil swaps for crushed chocolate biscuits of any kind, and its candy pumpkin swaps for a mandarin segment standing in the soil if the candy pumpkins have sold out — which, in the last week of October, they sometimes have.
- Smaller or larger tables: every recipe here halves cleanly — 6 pieces of anything is a fair test batch for a small party — and every recipe doubles without any change except a second run on the same sheet pan for the three bakes. For a classroom of thirty, double the cheapest four foods (ghost chips, mandarins, broomsticks and finger cookies) rather than all ten: the table looks twice as full for a fraction of the cost of doubling the caprese and the pizzas.
FAQs
How long can the party food sit out on the table?
Two hours for anything perishable, counted from when it goes out: the devilled eggs, pepper cups, caprese skewers, dirt cups, assembled broomsticks, banana pops once out of the freezer, and the mummy pizzas once they have cooled. After 2 hours, refrigerate what is still within its fridge life or discard it — and the practical way to run a longer party is to hold half of each chilled food back in the fridge and swap it in halfway, so nothing on the table is ever old. The ghost chips, mandarin pumpkins and finger cookies have nothing perishable in them and can sit out for the whole party.
What can I make ahead, and what has to be done on the day?
The witch finger cookies are the true make-ahead food — up to 4 days in a tin, and the shaped dough freezes for up to 3 months. The eggs for recipe 4 can be boiled up to 2 days ahead, the banana pops frozen the day before, and the dirt cup pudding cupped on the morning of the party. Everything with a face or a filling is a day-of job: carve the peppers, fill the eggs, thread the skewers and assemble the broomsticks on the day, and run the three sheet-pan bakes in the last hour. The make-ahead order in the Storage section above lays the whole sequence out in one list.
How do I make the witch finger cookies nut-free?
Leave the almond off — the almond is only the nail, and the cookie itself contains no nuts. Press a pumpkin seed or sunflower seed into the tip of each finger before baking instead, or hold a halved dark grape on each cooled cookie with a dab of jam. State the version plainly on a small card on the platter, as recipe 9 sets out, and if you serve both versions at one party, plate and label them separately so no parent has to guess which finger is which.
Why is there no dip among the party foods?
Because of the title’s own test: a child holding a plate in one hand, in a costume, cannot use one — and a food that needs a second item to be complete is not a one-hand food. Every recipe here is finished as it is picked up. The single serving suggestion in the post is a small bowl of shop-bought salsa alongside the ghost chips in recipe 2, for older children and adults; it is a suggestion only, there is no dip recipe in the post, and the chips are seasoned and complete without it.
Will one sheet pan really do the whole post?
Yes — it is the only oven equipment the post uses, and only three of the ten foods go near it: the ghost chips, the mummy pizzas and the finger cookies, each in a single batch on a large rimmed pan, baked back to back in well under an hour in total. The other seven foods are assembly-only — cut, filled, skewered, peeled or chilled. The banana pops use the same pan as their freezer tray, and the freezer in that recipe is a setting step that firms the coating, not a second appliance. If any single bake does not fit your pan in one uncrowded layer, run it in two goes on the same pan rather than buying or borrowing a second one.
Made this? Pin it for tonight 📌 — it genuinely helps Weeknight Foodie grow.
You might also like:
- 9 Air Fryer Game Day Snacks for Football Sundays — the grown-ups’ table companion to this one: the same one-hand party logic, built for a football Sunday crowd rather than a children’s party
- 10 Slow Cooker Dips for Game Day (Set Them Out and Walk Away) — the set-it-out party post for the adults’ end of the table, hands-off in the slow cooker while this spread is being assembled
- 12 Easy 5-Ingredient Slow Cooker Dinners — a proper dinner to feed everyone before the party starts, cooking itself while the Halloween table goes out
- 5 Spooky Halloween Party Drinks (All Non-Alcoholic) — the drinks half of the same Halloween table